The cabinet under a deep utility sink is where organization goes to die. It starts innocent enough, a spare sponge, a stain spray, a jug of detergent you swore you would decant later.
Then one day you open the door and a half-empty bottle of cleaner tips over onto the plumbing and you realize you are one leak away from a science project.
I have wrangled more than one under-sink cabinet in my house, and the laundry sink is always the trickiest because the basin is deeper, the pipes are chunkier, and everything you store down there tends to be either wet, harsh, or both. The goal is simple: grab what you use fast, prevent damp items from molding, and contain the scary stuff so it is controlled and (ideally) out of kids’ reach.
Start with a quick reset
You do not have to do a full declutter marathon here. Ten minutes makes a difference.
- Empty everything and wipe the base with warm soapy water.
- Check for leaks around the trap and supply lines. If you see steady dripping or active corrosion, fix that first.
- Toss the truly gross stuff: moldy sponges, mystery rags, crusty half-used products that are duplicated three times.
- Group by job: sink cleaning, laundry stain treatment, floor cleaning, and tools like gloves or scrub brushes.
If you have little kids in the house, this is also your moment to decide which products need to live up high instead of down low. Under-sink storage is convenient, but it is not automatically safe.
Measure before you buy anything
This is the step that saves you from ordering a shelf that does not fit, then rage-returning it.
- Width: interior cabinet width, wall to wall.
- Depth: from the back wall to the inside of the door frame.
- Height: floor to the lowest obstruction (often the sink bowl).
- Pipe offset: note whether the drain sits centered or shifted left or right.
I also like to snap a quick photo of the plumbing with the door open. When you are shopping, it helps you remember where the weird bumps and angles actually are.
The under-sink layout that works
Think of the cabinet in three zones:
- Top zone (above the trap) for small, frequent-use items.
- Side zones for bottles you want upright and contained.
- Door zone for light, hangable tools and damp sponges that need airflow.
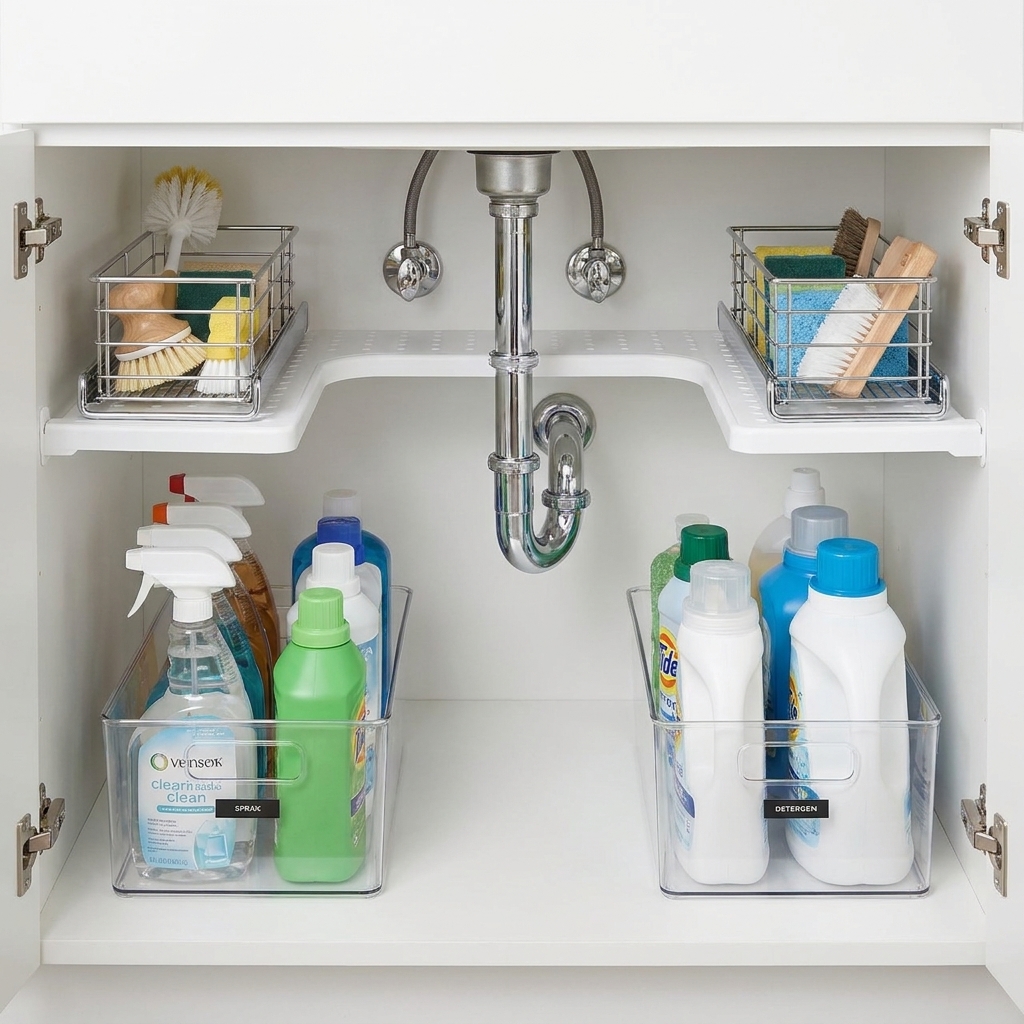
This is where expandable tension shelves, pull-out caddies, and door hooks shine because they work around plumbing instead of fighting it.
Use a tension shelf for a second level
If you only do one thing, do this. An expandable tension shelf adds a usable surface above the pipes so you stop stacking bottles like a game of Jenga.
What to look for
- Adjustable width so it fits your cabinet without cutting anything.
- Rust-resistant material since this cabinet is a moisture magnet.
- A U-shape or modular center section if you need to work around a big drain assembly.
My simple setup
- Top shelf: stain sprays, hand soap refills, small scrub brush, a backup sponge still in its wrapper.
- Floor of cabinet: heavier jugs and anything that could leak, always in a bin.
Quick mom tip: if you have to lift three items to reach one thing, it will not stay organized. The tension shelf is your shortcut out of that cycle.

Add pull-out caddies for messy stuff
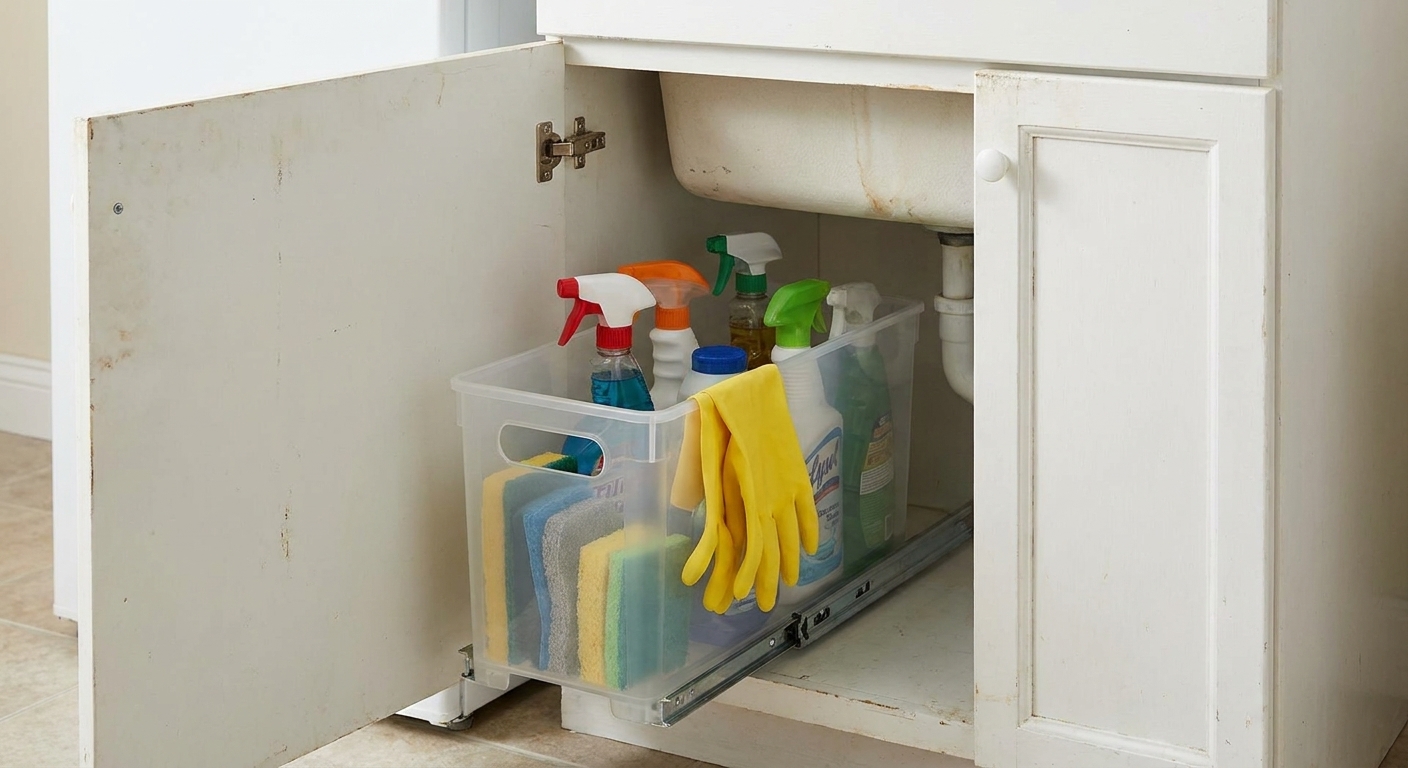
Deep utility sinks usually mean deeper cabinets, and deep cabinets turn into black holes. Pull-out caddies fix that by bringing everything to you.
How to assign caddies
- Caddy 1: Laundry-only chemicals (bleach, oxygen brighteners, sanitizer, washer cleaner).
- Caddy 2: Sink and utility cleaning (abrasive cleanser, disinfectant, grout brush, gloves).
Each caddy should be a self-contained spill zone. If a bottle leaks, you want the mess in the bin, not glued to the cabinet floor forever.
Placement trick for plumbing
Slide caddies into the left and right side zones, then keep the awkward middle section (where the drain lives) for tall items that can stand still, like a plunger or a narrow bin of rags.
If your cabinet has a center support or the pipes sit off to one side, you can do one wider caddy on the open side and a narrow bin on the tight side.
Door hooks for damp sponges and gloves
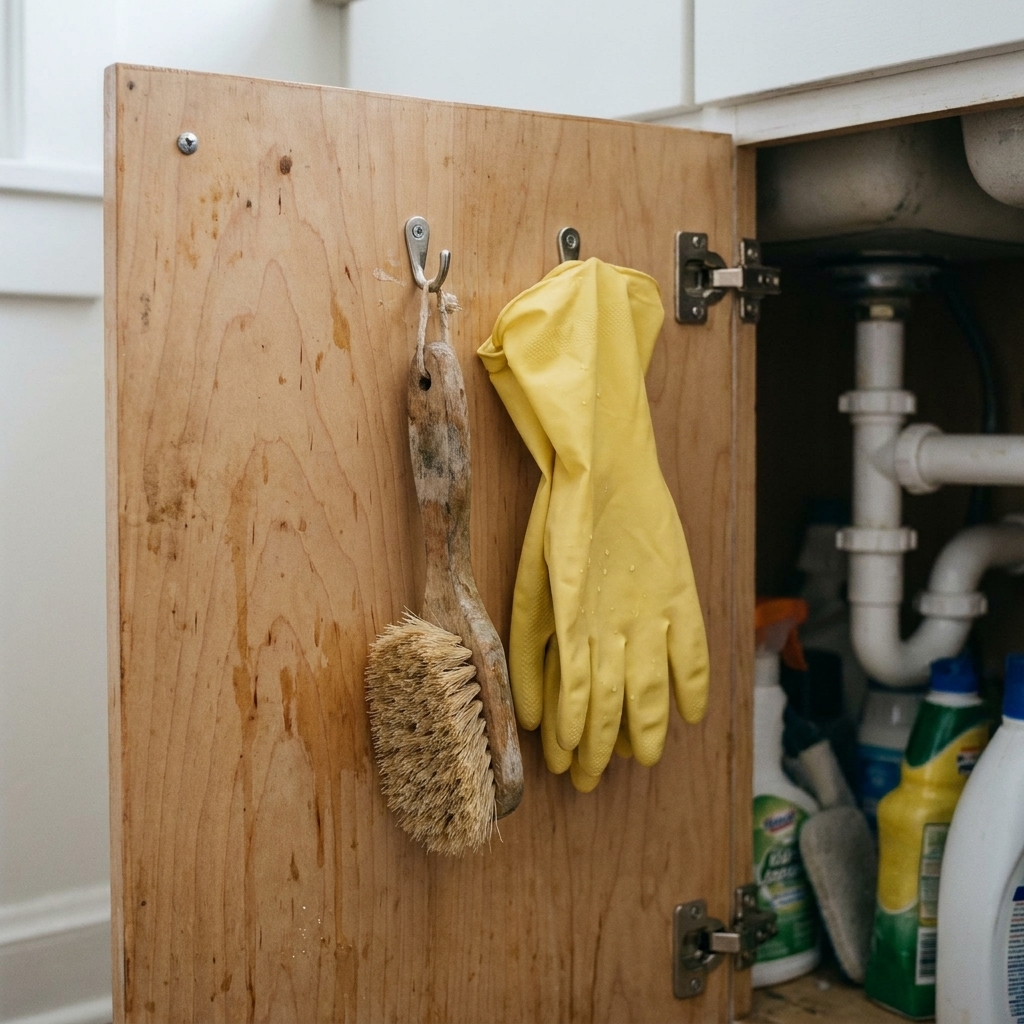
This is the piece most people miss. Sponges and scrubbers cannot dry properly when they are tossed in a bin, and that is how you get the smell. Door-mounted hooks help damp items air out.
What to hang
- Scrub brush with a loop or handle hole.
- Rubber gloves clipped together so they dry as a pair.
- Mesh pouch holding microfiber cloths that are “in between” clean and dirty.
What not to hang
- Anything heavy (large spray bottles) that could stress hinges.
- Anything that could drip bleach onto the cabinet floor.
For a sponge, I like a small hook plus a simple clip so the sponge hangs edge-down. More airflow, less funk.
Contain harsh products for spills
I store harsh cleaners like I assume a cap will loosen and a bottle will tip, because eventually it will.
- Use a bin with sides for bleach, disinfectants, and anything corrosive.
- Keep products upright and do not stack bottles on top of one another.
- Separate reactive categories when you can. For example, keep bleach well away from ammonia-based cleaners. The danger is when fumes or liquids mix.
- Store everything in original containers with the label intact. If you do decant, make sure the new container is clearly labeled and never mix products.
Important safety note: bins help with spill containment, not child safety. If you need kid-safe storage, use a proper child-resistant lock or move harsh chemicals to a truly inaccessible spot.
If decanting helps you keep duplicates under control, I walk through my approach in Decanting and Organizing Laundry Supplies.
Protect the cabinet base
Under-sink cabinets take a beating. A little protection keeps one drip from turning into swollen particleboard.
- Best option: a wipeable waterproof liner that fits the cabinet floor.
- If you use a towel: treat it like a temporary drip catcher, not a permanent solution. Towels stay damp and can mildew fast down there.
- Keep the bin edges clean: sticky rings form where bottles sit, and that is what makes this cabinet feel gross.
Make room for the weird stuff
Under a laundry sink, you always end up with odd-shaped things. Here is what has worked in my house.
- Rags: stand them vertically in a tall, narrow bin so you can grab one without unstacking the pile. If a rag is actually wet, hang it to dry first before it goes back under the sink.
- Powders: keep them in a sealed container and put that container in a caddy. Powders plus humidity equals clumps.
- Backups: one backup per product type, max. If you need budget-friendly ideas for making small storage behave, I rounded up favorites in 15 Dollar Store Organization Hacks for a Budget Laundry Makeover.
My 15-minute maintenance routine
This cabinet stays organized only if the system is easier than the chaos. Once a week (usually while I am waiting on a cycle), I do this:
- Hang up the gloves properly.
- Swap the sponge on a regular cadence (weekly or every two weeks, depending on how hard it is working). If it smells off, it is done.
- Wipe drips inside the chemical bin.
- Put stray bottles back into their caddy.
Once a month, I pull the caddies out, wipe the base, and make sure nothing is leaking behind the pipes. It is boring, but it saves you from the sticky mystery puddle situation.
Fixes for common problems
“My cabinet is too short for a shelf.”
Skip the shelf and do two low, shallow bins side-by-side. You will still gain control by containing categories and preventing tipping.
“The plumbing is in the way of everything.”
Use the tension shelf to bridge the space, then treat the pipe area like a no-storage zone except for a narrow bin of dry rags or a tall, skinny item that can stand without falling.
“Everything smells damp.”
Stop storing wet sponges in closed bins, switch to door hooks, and make sure nothing is dripping from the faucet or drain. If you can, leave the cabinet door cracked open for an hour after you clean the sink so it can air out.
“I need kid-safe storage.”
Move harsh chemicals out of the under-sink cabinet entirely if you can. If you must store them here, keep them contained and use a child-safety lock that fits your cabinet style. A back corner is harder for little hands, but it is not a safety plan.
More laundry zone ideas
Once the utility sink cabinet is under control, the rest of the laundry room feels easier. These are good next steps if your space is tight:
- Genius Storage for the Gap Between Washer and Dryer
- Floating Shelves vs Wire Racks for Laundry Storage
- Maximizing Storage in a Tiny Bi-Fold Laundry Closet
Organizing under the sink is not glamorous, but it is one of those tiny upgrades that makes laundry day feel less like a scavenger hunt. And I will take that win any week.